Backup, Restore and Proxies
FPP Backup
FPP has several backup options. You can save just your configuration files (the JSON Configuration Backup), or your configuration and all relevant files (the File Copy Backup). FPP also creates a backup of your configuration every time you make a system change. Open Status/Control → FPP Backup.
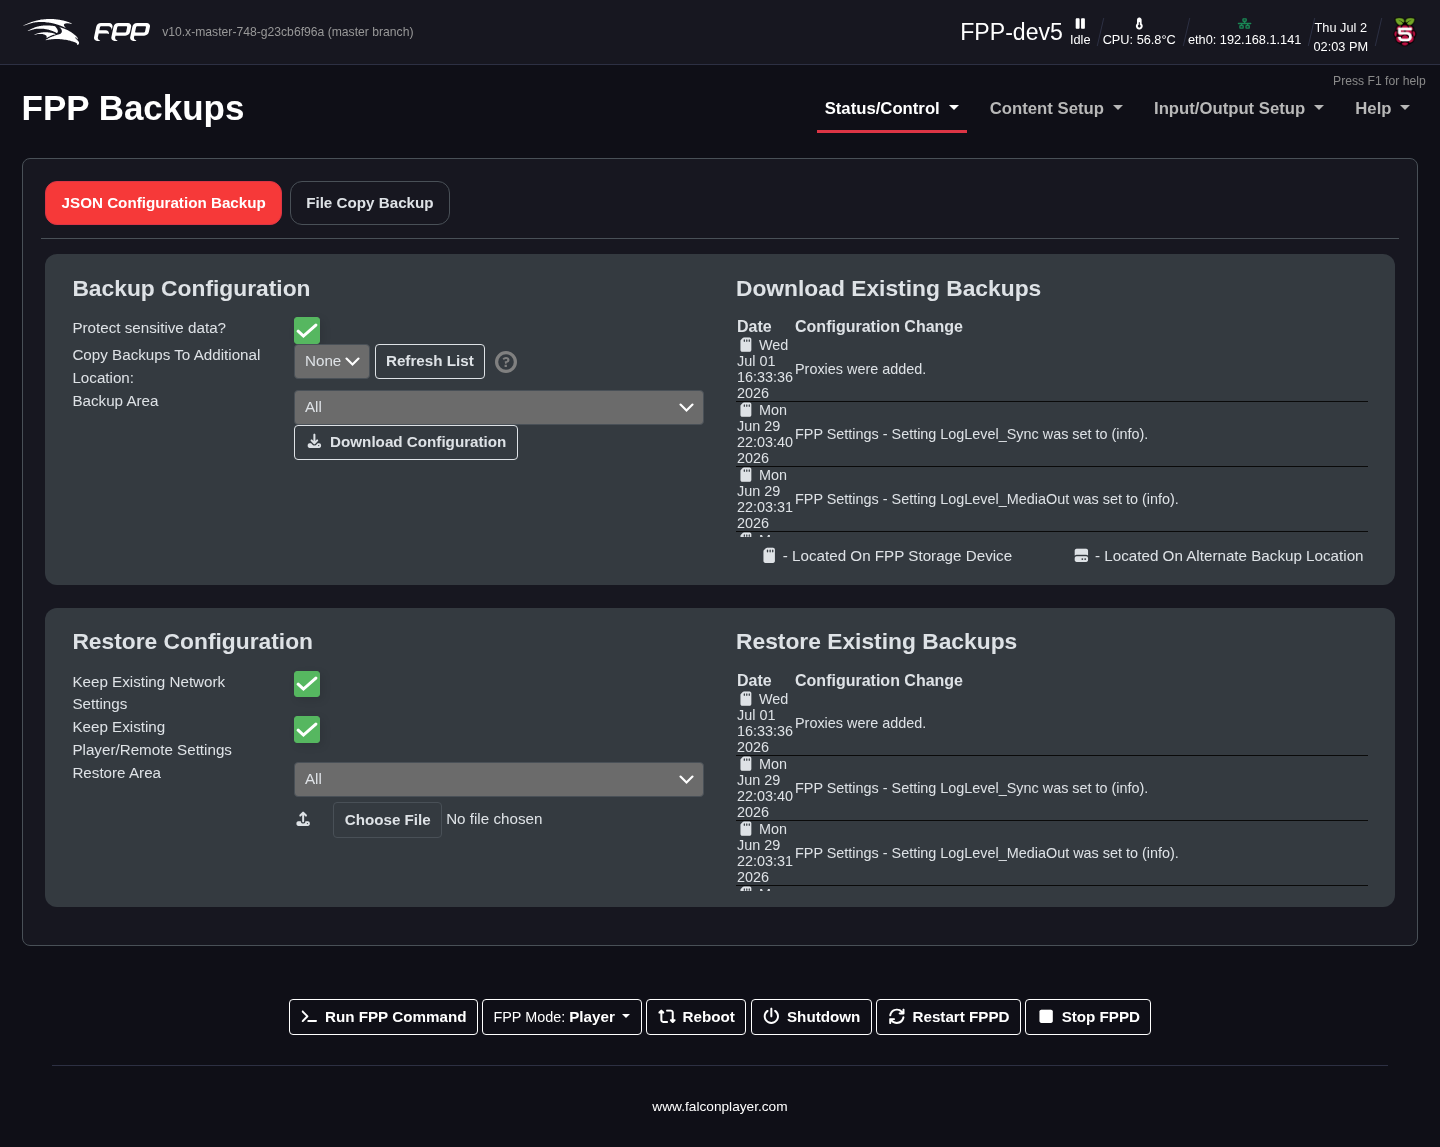
JSON Configuration Backup
This saves all or part of your settings to your computer to restore later. It saves only the selected configuration files — not sequences, audio or video.
Backup Configuration (creating a backup):
- Protect sensitive data – when selected, your wlan0 network password is not saved, and you must re‑enter it after restoring. When cleared, a complete backup is saved and the device should be fully functional when restored — but anyone with the backup file can read your wireless password from it.
- Backup area – which portion of the configuration to save; normally select all, or choose individual sections.
- Download Configuration – save the configuration to your computer. The file is named with the device name and a timestamp so you can identify the newest.
- Download Existing Backups – FPP keeps a backup after every system change; download any of them here.
Note
This does not save media files such as sequences, music or videos.
Restore Configuration:
- Keep Existing Network Settings – if selected, the device's saved network settings are not overwritten by the backup.
- Keep Existing Player/Remote Settings – if selected, the Player/Remote settings are not overwritten.
- Restore Area – restore only a specific area; other settings are left alone.
- Choose File – select the backup file to restore from (check you have the right one if you keep several).
- Restore Configuration – restore the selected areas from the chosen file.
- Restore Existing Backups – restore from one of FPP's automatic backups.
File Copy Backup
The File Copy Backup copies every item stored on the device except the operating system — useful for keeping full copies of your FPP devices. You can save to several locations.
Note
If you plug in a USB drive after the device has booted, press Refresh List to detect it.
- Copy Type – the operation to perform:
- Backup To USB / Restore From USB – copy selected items to/from a USB drive on this device. (Restore overwrites existing files.)
- Backup To / Restore From Local FPP Backups Directory – copy to/from a backup folder on this device's SD card.
- Backup To / Restore From Remote FPP Backups Directory – copy to/from a backup folder on another FPP device on your show network (you enter its host name or IP).
- USB Device – appears for USB options; pick the drive (use Refresh List if it is not shown).
- Hostname/IP – appears for remote options; the remote device's address.
- Backup Path – for Copy To, defaults to this device's host name (change with care); for Copy From, lists the available backup directories.
- What to copy – the items to include.
- Delete extras – on restore, delete any files on the device before restoring from the backup folder.
Note
There is no advance warning if there is not enough space for a backup;
during the process you will see an rsync ... No space left on device error. An
incomplete backup will not restore completely.
Proxy Settings
Proxy Settings route network traffic through an FPP device to a connected controller. Open Status/Control → Proxy Settings.
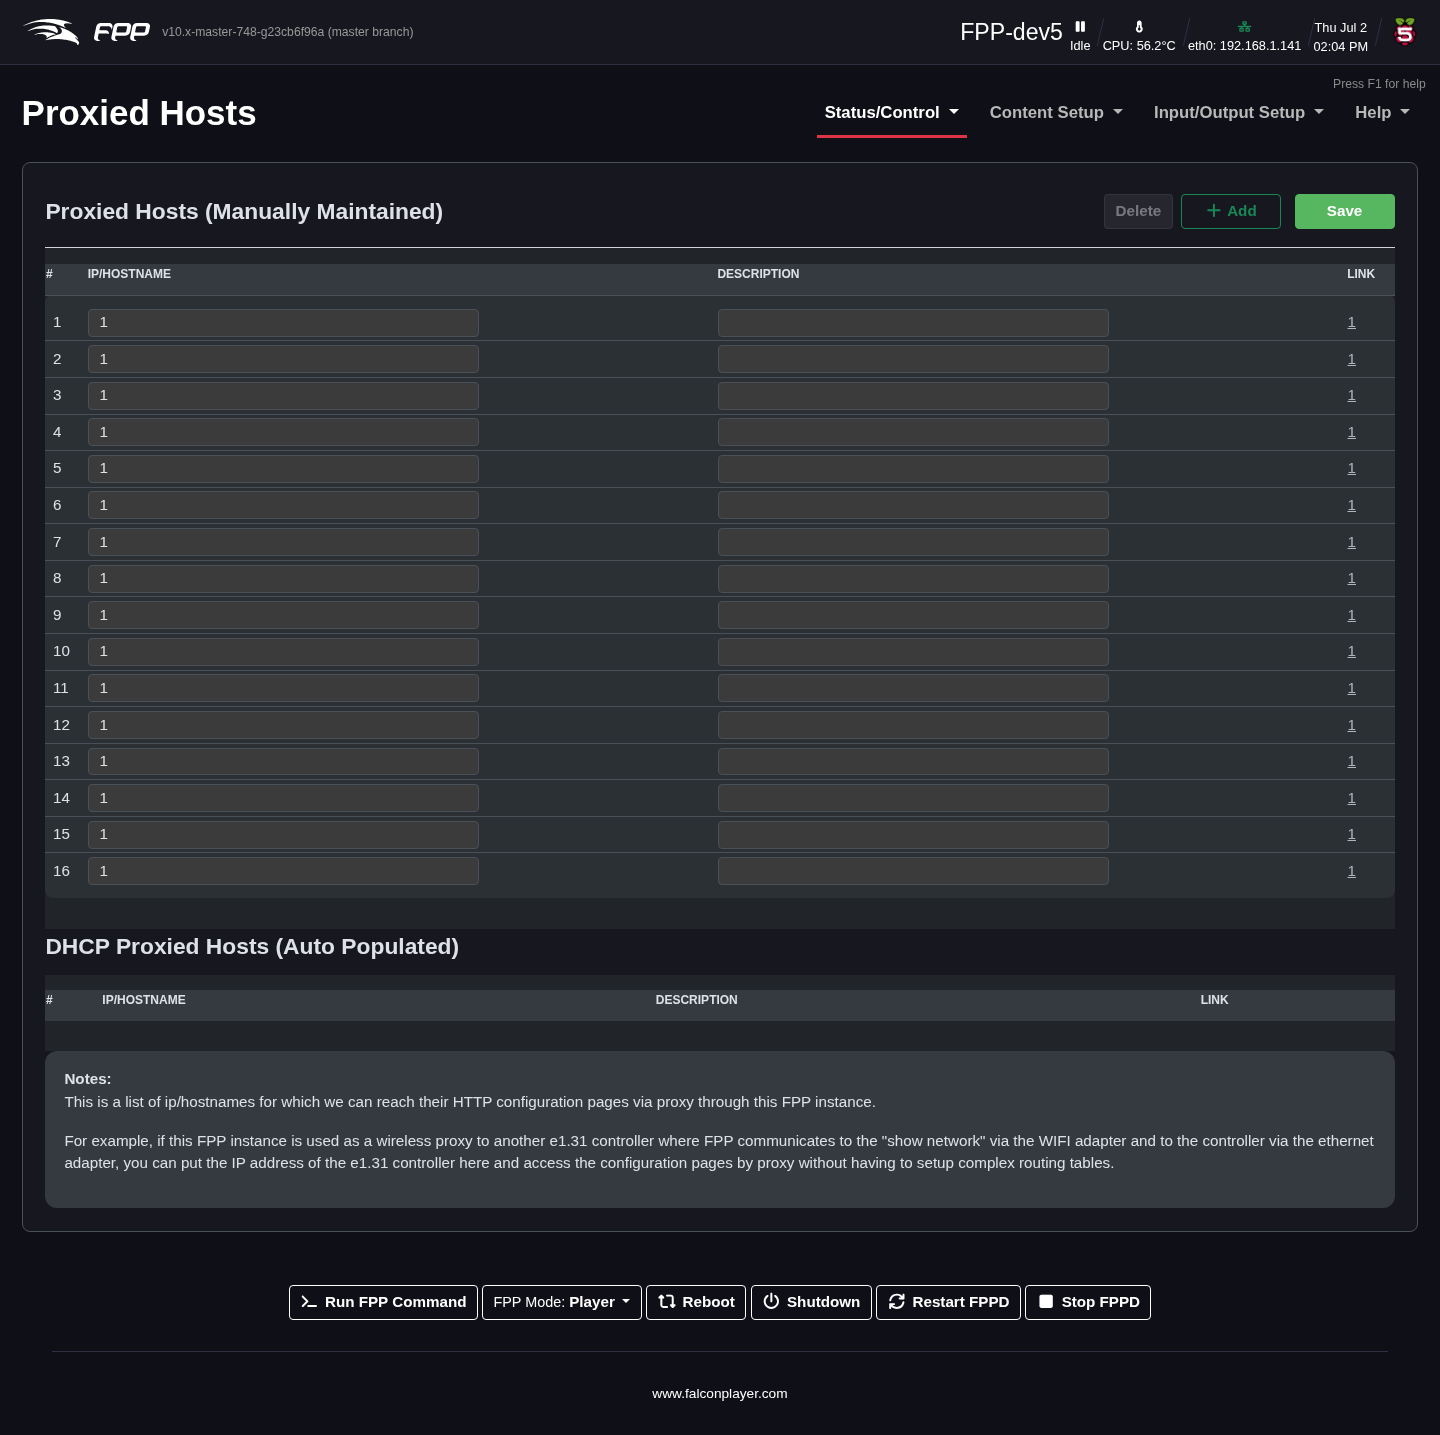
Configure FPP as a Proxy Host by entering the IP address of the controller(s)
attached to it, so you do not need static routes on your computer or router
(especially helpful on Macs, where routes are not persistent). To reach a proxied
controller's web UI, click its link on the Proxied Hosts page, or enter the FPP
device's IP followed by /proxy/ and the controller's address — for example, if
the FPP's wlan0 IP is 192.168.1.101 and the controller is 192.168.101.2,
browse to 192.168.1.101/proxy/192.168.101.2.
Not all controllers support being proxied. Falcon controllers (with current firmware) and KulpLights controllers do.
Configuring proxies from xLights (recommended): in the example, an F16 uses a
Raspberry Pi as its Proxy Host. The Pi has a Wi‑Fi (wlan0) address of
192.168.1.200 on the home network and an eth0 address of 192.168.200.2; the
F16 is wired to the Pi at 192.168.200.3. In xLights, define the controller that
needs the proxy with the IP address of the FPP device acting as proxy — the more
globally reachable interface, here the Pi's wlan0 address (192.168.1.200). Then
in FPP Connect, tick Upload for the Proxy Host (the Pi) and enable Add
Proxies (do not add proxies for the controller that needs the proxy), and
set UDP Out to Proxied.