FPP Settings
The FPP Settings page (Status/Control → FPP Settings) is where you set up administrative functions and settings. In FPP 10 the settings are organised into a row of tabs across the top of the page: Playback, Audio/Video, Localization, UI, Email, MQTT, Privacy, Input/Output, Logging, Services, Storage, System and Developer.
Note
The FPP Settings page displays differently depending on your UI Level, hardware and mode. Most settings save immediately; some prompt you to Restart FPPD or Reboot before they take effect.
UI Levels
FPP has several UI Levels that show more or fewer settings so that advanced options do not clutter the screen (set on the UI tab — see below). In addition, individual settings are tagged with an icon indicating the minimum level at which they appear:
- 🎓 Advanced Level Setting
- 🧪 Experimental Level Setting
</>Developer Level Setting
Settings with no icon appear at all levels. Throughout this chapter, items marked (Advanced), (Experimental) or (Developer) are only visible at that UI Level or higher. If a setting described here is not visible, raise your UI Level.
Playback
Configures general playback behaviour.
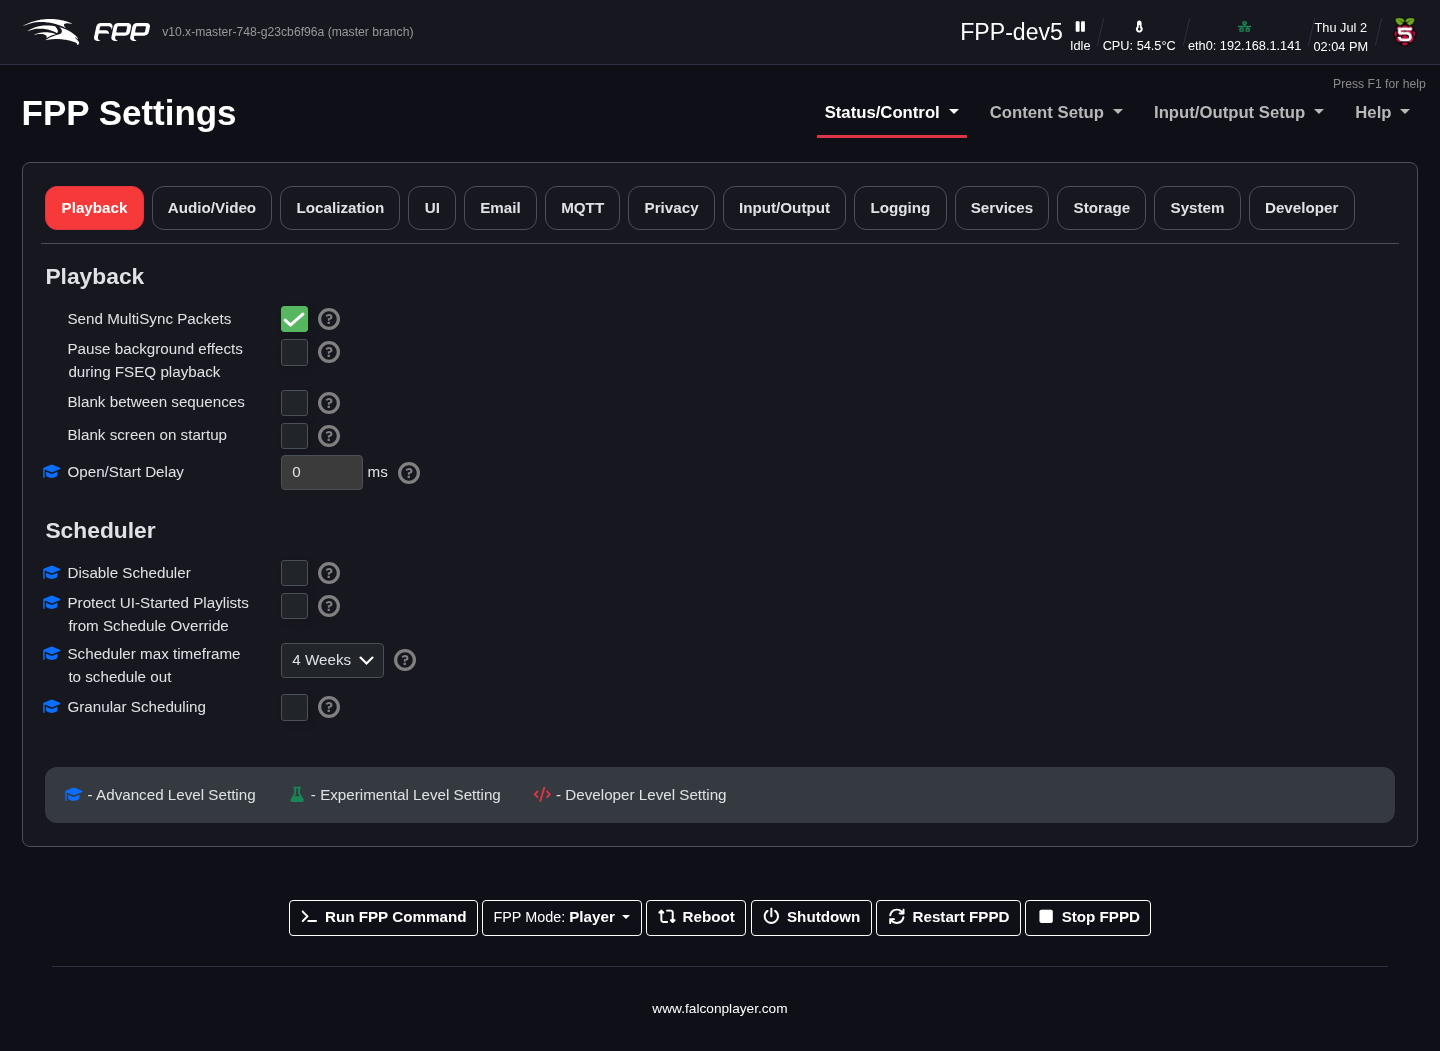
- Send MultiSync Packets (Player only) – send MultiSync packets to remote devices (see MultiSync).
- Pause Background Effect Sequence during FSEQ playback – effect sequences normally take priority over FSEQ files; select this if you want the FSEQ file to take priority over a background effect sequence.
- Blank between sequences – send blanking data to turn the pixels off between items.
- Blank screen on startup – turn all channels off at boot.
- Open/Start Delay – a delay (ms) before playback begins.
Scheduler sub‑settings:
- Disable Scheduler – globally turn scheduling off.
- Protect UI‑Started Playlists from Schedule Override – stop a scheduled item interrupting a playlist you started by hand.
- Scheduler max timeframe to schedule out – how far ahead the schedule is calculated (this governs the Status page's schedule Preview range).
- Granular Scheduling – finer‑grained schedule control.
Audio/Video
The Audio/Video tab is substantially expanded in FPP 10, which uses a PipeWire‑based audio/video pipeline (with GStreamer) for flexible routing.
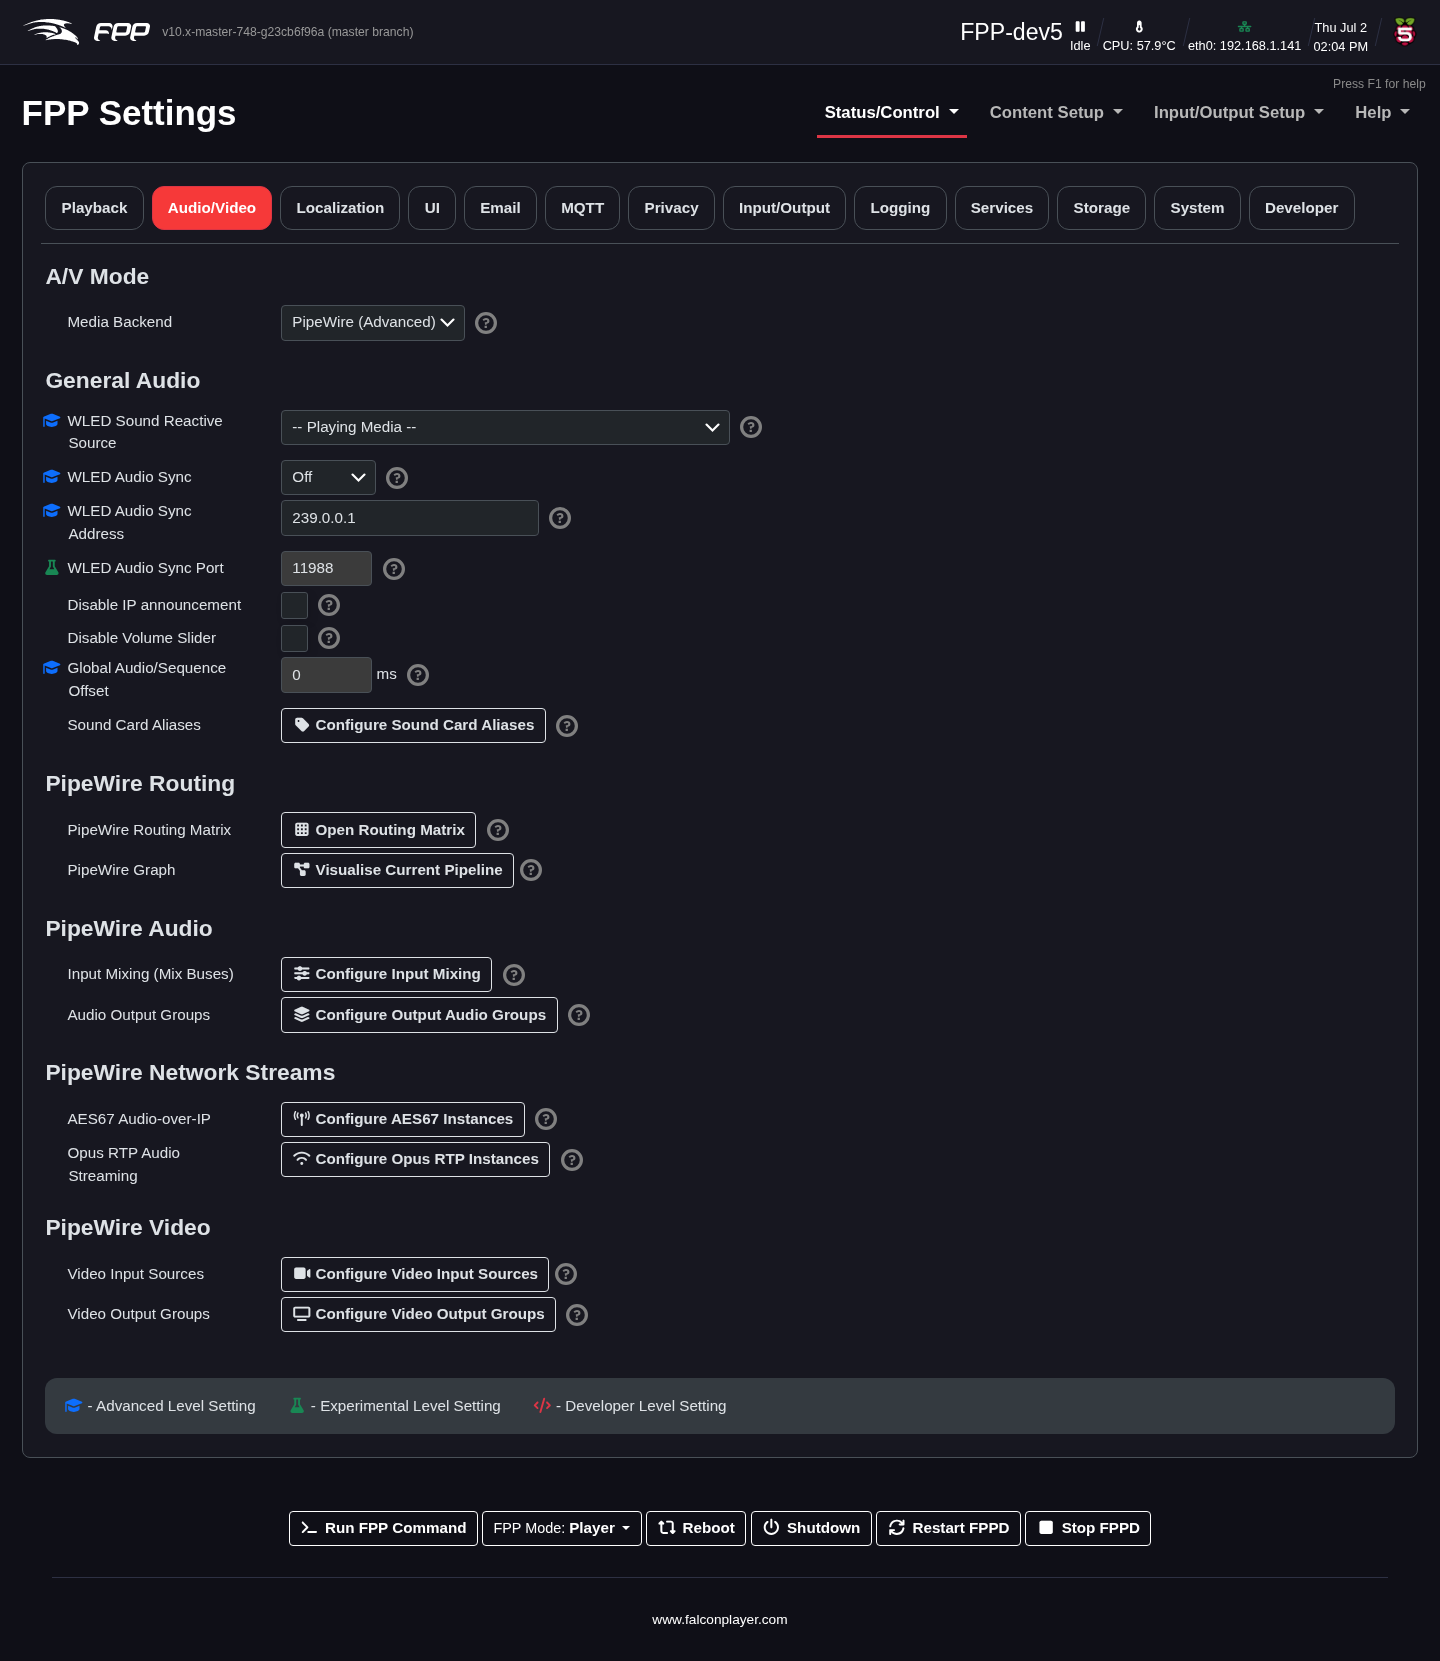
- A/V Mode → Media Backend – selects the media backend; PipeWire (Advanced) enables the full routing capabilities below.
- General Audio – master audio behaviour, including Global Audio/Sequence Offset (a fine sync trim in ms), Disable Volume Slider, and the WLED Sound Reactive / WLED Audio Sync options for driving sound‑reactive WLED devices. Configure Sound Card Aliases gives friendly names to audio devices.
- PipeWire Routing – Open Routing Matrix to patch audio sources to outputs, and Visualise Current Pipeline to see a live PipeWire graph.
- PipeWire Audio – Configure Input Mixing (Mix Buses) and Configure Output Audio Groups to combine and split audio across multiple outputs.
- PipeWire Network Streams – AES67 Audio‑over‑IP and Opus RTP Audio Streaming for sending/receiving audio over the network.
- PipeWire Video – Configure Video Input Sources and Configure Video Output Groups for HDMI/video routing and video‑to‑pixel mapping.
Note
Each of these buttons opens a dedicated configuration page with substantial functionality of its own. The whole pipeline — sound card aliases, audio output groups (delay/EQ per card), input mixing, the routing matrix, the live pipeline graph, AES67 and Opus RTP audio streaming, and video input/output groups — is documented in its own chapter, The PipeWire Audio & Video Pipeline, which immediately follows this one. (It replaces the simpler Audio/Video settings of FPP 9.x.)
Localization
Configures time and location. For playlists to start automatically at scheduled times, the scheduling FPP (not the remotes) must keep accurate time. Without internet access you can set the date and time manually, but without a Real‑Time Clock (RTC) or internet the time resets on reboot.
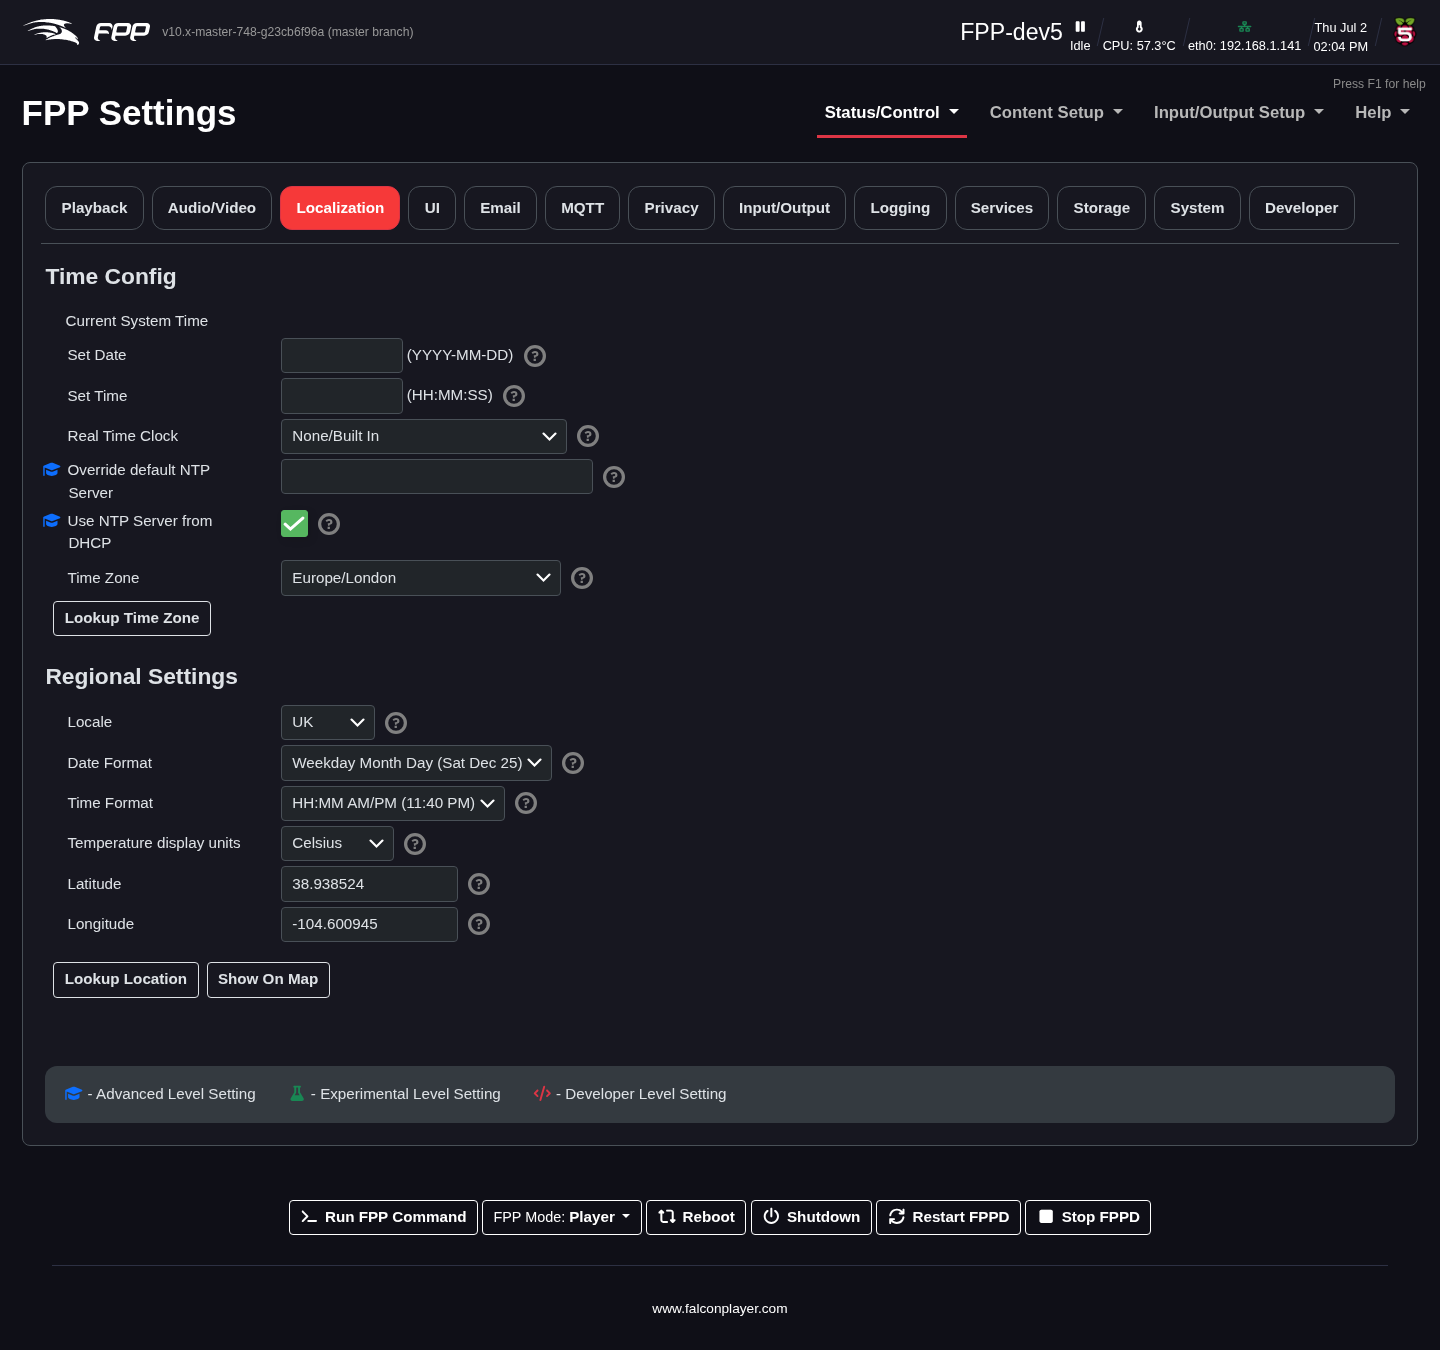
Time Config:
- Current System Time – the current date, time and configured time zone.
- Set Date / Set Time – set these manually when there is no network.
- Real Time Clock – if a cape/hat with an RTC is attached, select it from the list (FPP tries to detect it), reboot, then set the time here.
- Override default NTP Server – normally left blank; enter a different time server's IP only in special cases. (Advanced.)
- Time Zone – required so an NTP‑synced clock shows the correct local time.
- Lookup Time Zone – detect your time zone (requires internet).
Regional Settings:
- Locale – country‑specific settings such as Holidays used in the Scheduler.
- Date Format / Time Format – how dates and times are displayed.
- Temperature Display Units – Fahrenheit or Celsius.
- Latitude / Longitude – required for sunrise/sunset scheduling. Use Lookup
Location (verify with Show on Map), or obtain coordinates from
LatLong.netor Google Maps (in Google Maps they follow the@in the address bar, latitude first; keep any minus sign).
UI
Changes the appearance and behaviour of the web interface.
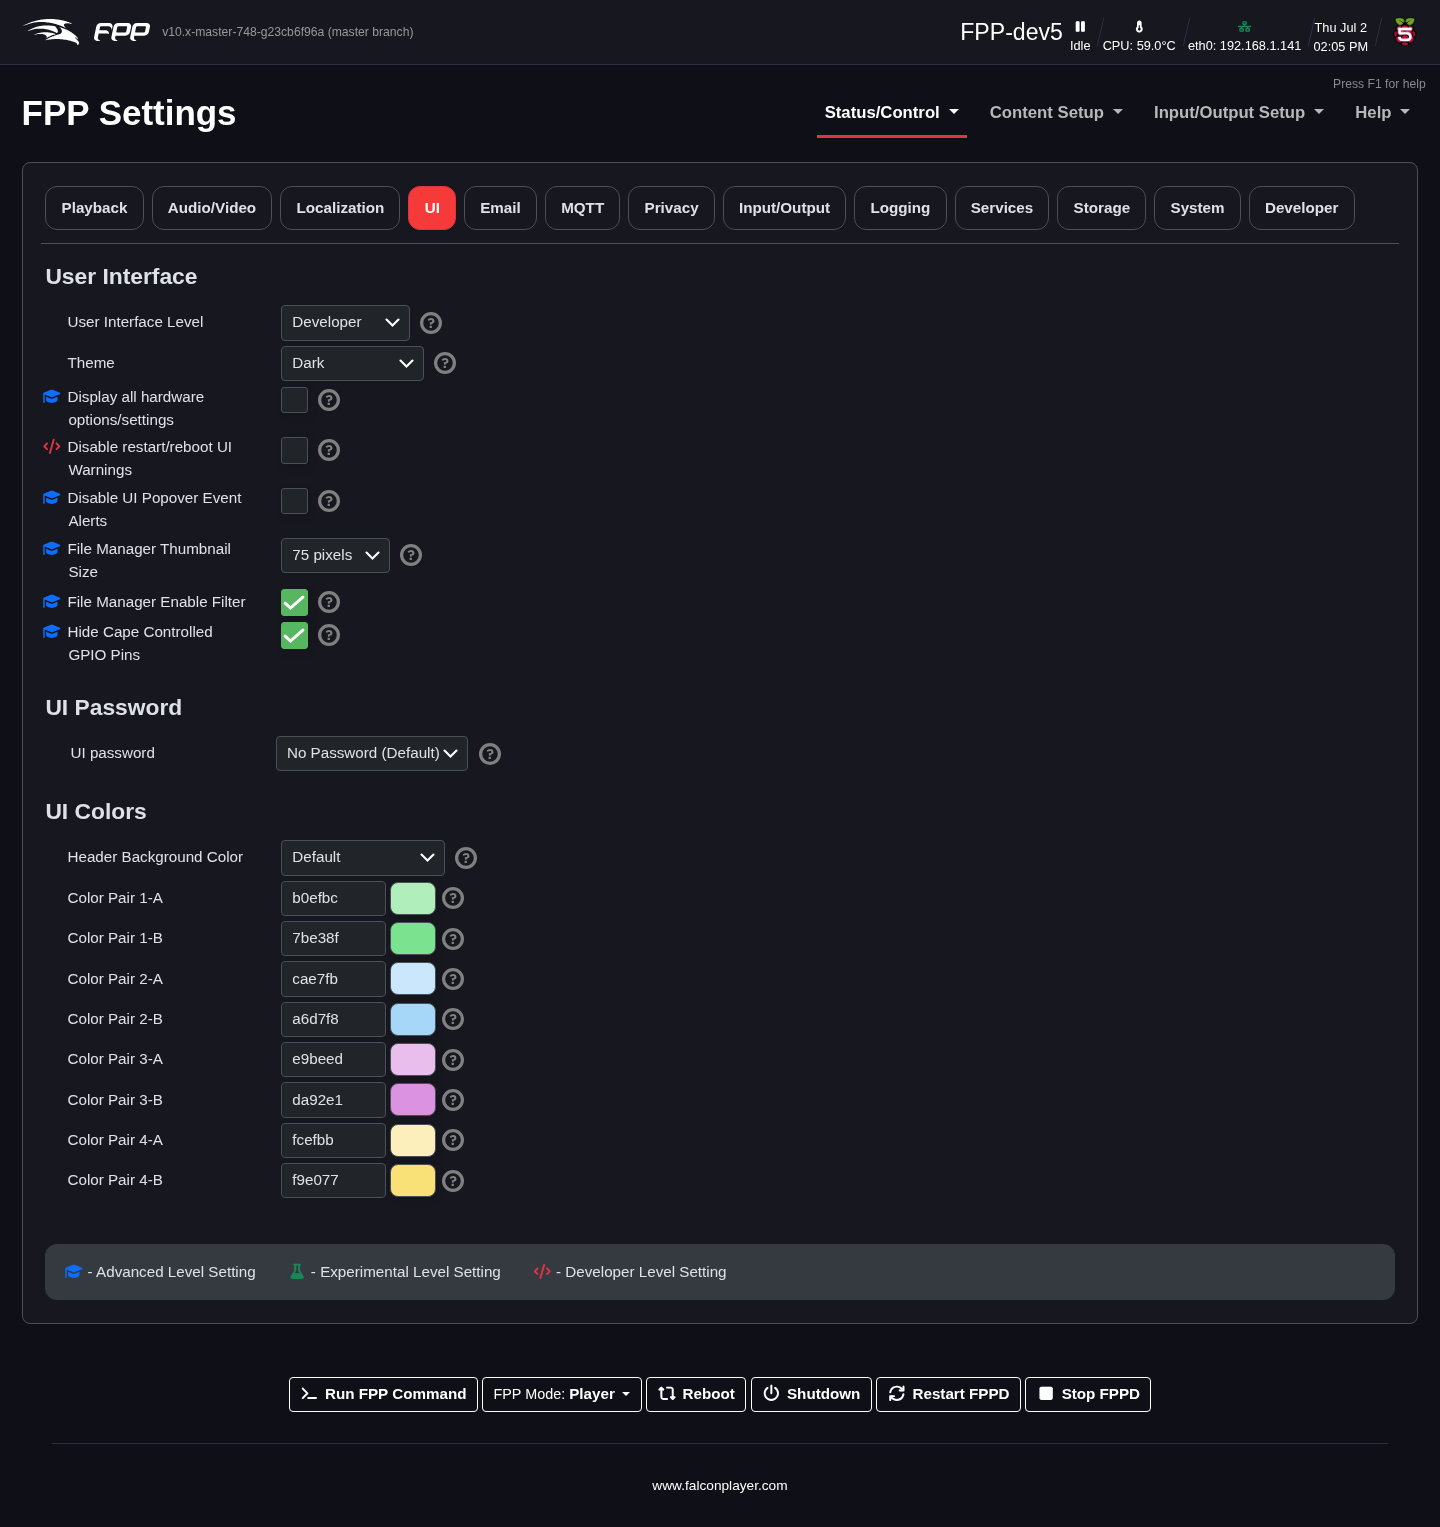
User Interface:
- User Interface Level – four levels that tailor how much is shown:
- Basic – all the settings most users need; the recommended setting.
- Advanced – extra features/settings for unusual configurations.
- Experimental – settings still in testing; changes may not work correctly until fully tested.
- Developer – settings used by developers for testing; changing these can cause problems if misconfigured.
- Display all hardware options/settings – show settings for all devices, even those not detected. Enabling this lets you change settings that could cause problems. (Advanced.)
- Disable restart/reboot UI Warnings – for developer testing; you may then not be warned when a reboot/restart is required. (Developer.)
- File Manager Thumbnail size – size of image thumbnails in the File Manager. (Advanced.)
- File Manager Enable Filter – toggle the File Manager's sort/filter header to free up screen space.
UI Password:
- UI Password – by default no password is required (the UI is only reachable from your local network). Setting one is for advanced users, as it can disable some FPP functionality without extra configuration. The password must be at least 8 characters; once set, log in with username admin and your password. (Defaults: username admin, password falcon.)
UI Colors:
- Header Background Color – colour the header to tell devices apart at a glance.
- Color Pairs – the colours used in tables such as the Schedule Preview, making scheduling problems easier to spot.
Email
Lets FPP send email (via FPP commands or a script).
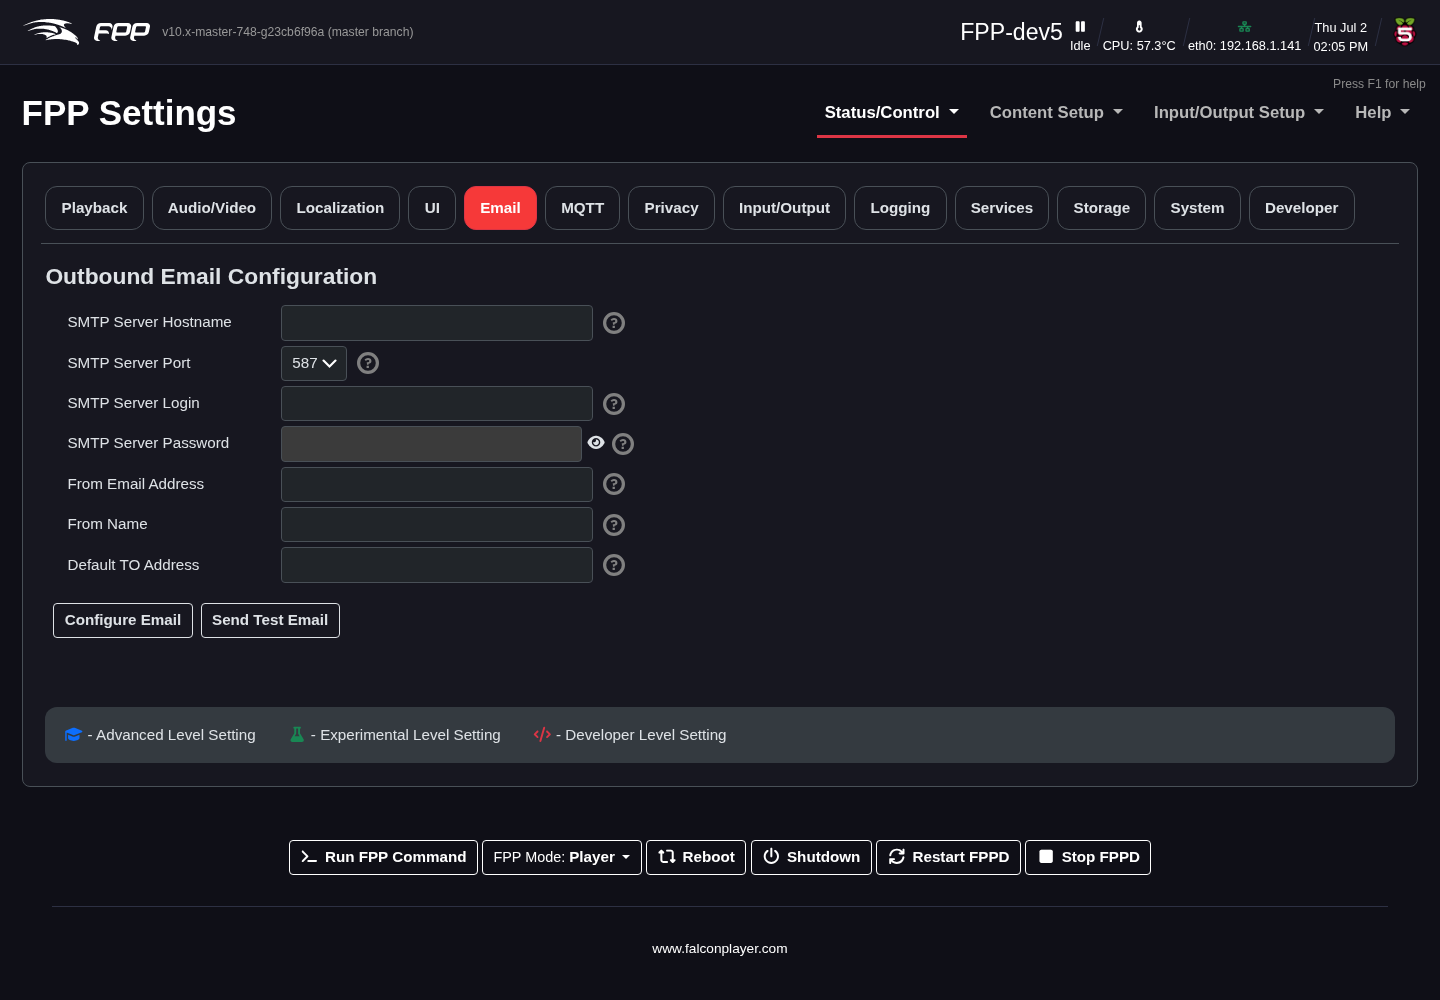
- SMTP Server Hostname / Port – your mail server and port (587 is most common; 465 and 25 are also used).
- SMTP Server Login / Password – credentials for the sending account.
- From Email Address / From Name – the sender shown on the email (the From Name could be the FPP host name).
- Default TO Address – the default recipient.
- Configure Email saves the settings; Send Test Email tests them.
Note
Some providers (e.g. Gmail, Yahoo) block third‑party clients by default; you may need to adjust their security settings to allow FPP to send.
MQTT
Connects FPP to an MQTT broker for automation (e.g. a home‑automation system).
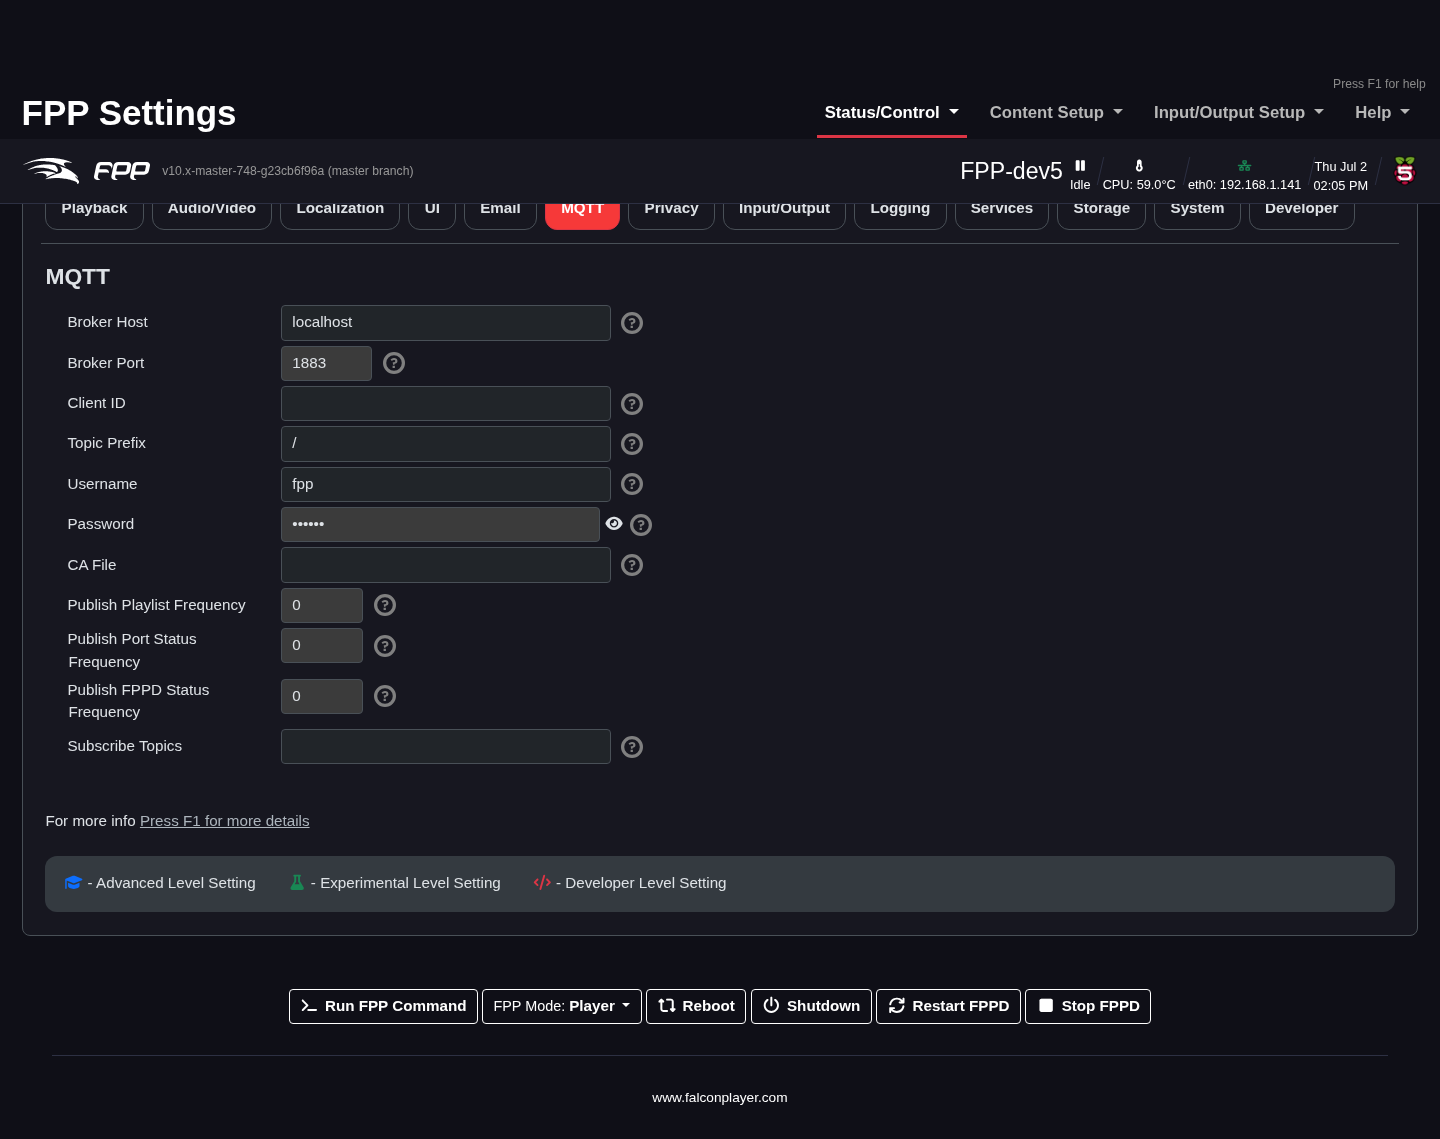
- Broker Host / Port – the broker's address and TCP port.
- Client ID – left blank, the broker assigns one.
- Topic Prefix – prefix used when publishing messages.
- Username / Password – broker authentication.
- CA File – optional CA to validate the broker's certificate (only for SSL with self‑signed certificates).
- Publish Frequency – how often to publish status;
0publishes on demand only. - Subscribe Topic – a topic to subscribe to (
#for all, or a filter such assmartthings).
Privacy
FPP's developers are cautious about privacy and let you customise what is shared.
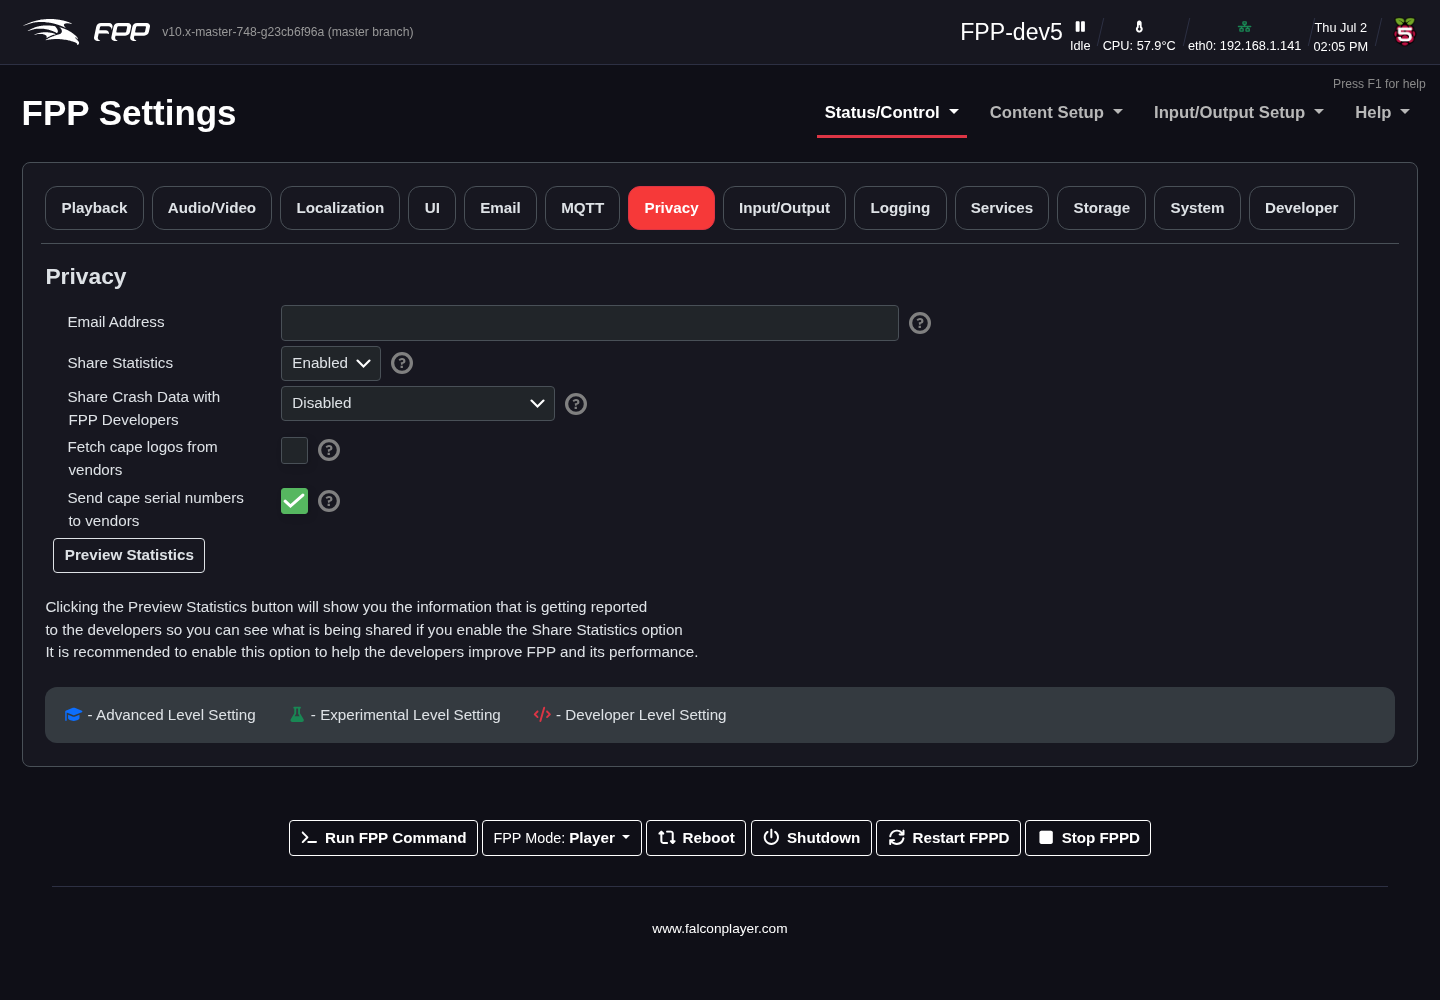
- Email Address – if you share crash data, this lets developers contact you for more information.
- Share Statistics – anonymous usage statistics (SBC type, installed plugins, FPP version, etc.) with no personally identifying information; click Preview Statistics to see exactly what is sent. Options: Enabled (recommended), Disabled, or Banner (prompt on the Status page).
- Share Crash Data with FPP Developers – choose what, if anything, is sent to help diagnose crashes. The default Include settings and configurations is recommended.
- Fetch cape logos from vendors – a vendor logo shown in the header must be downloaded from the vendor, which exposes your IP to them (usually low risk).
- Send Cape serial numbers to vendors – could identify you from purchase history (usually not a security issue), but you can disable it.
Input/Output
Global input/output settings (Advanced UI Level or higher).
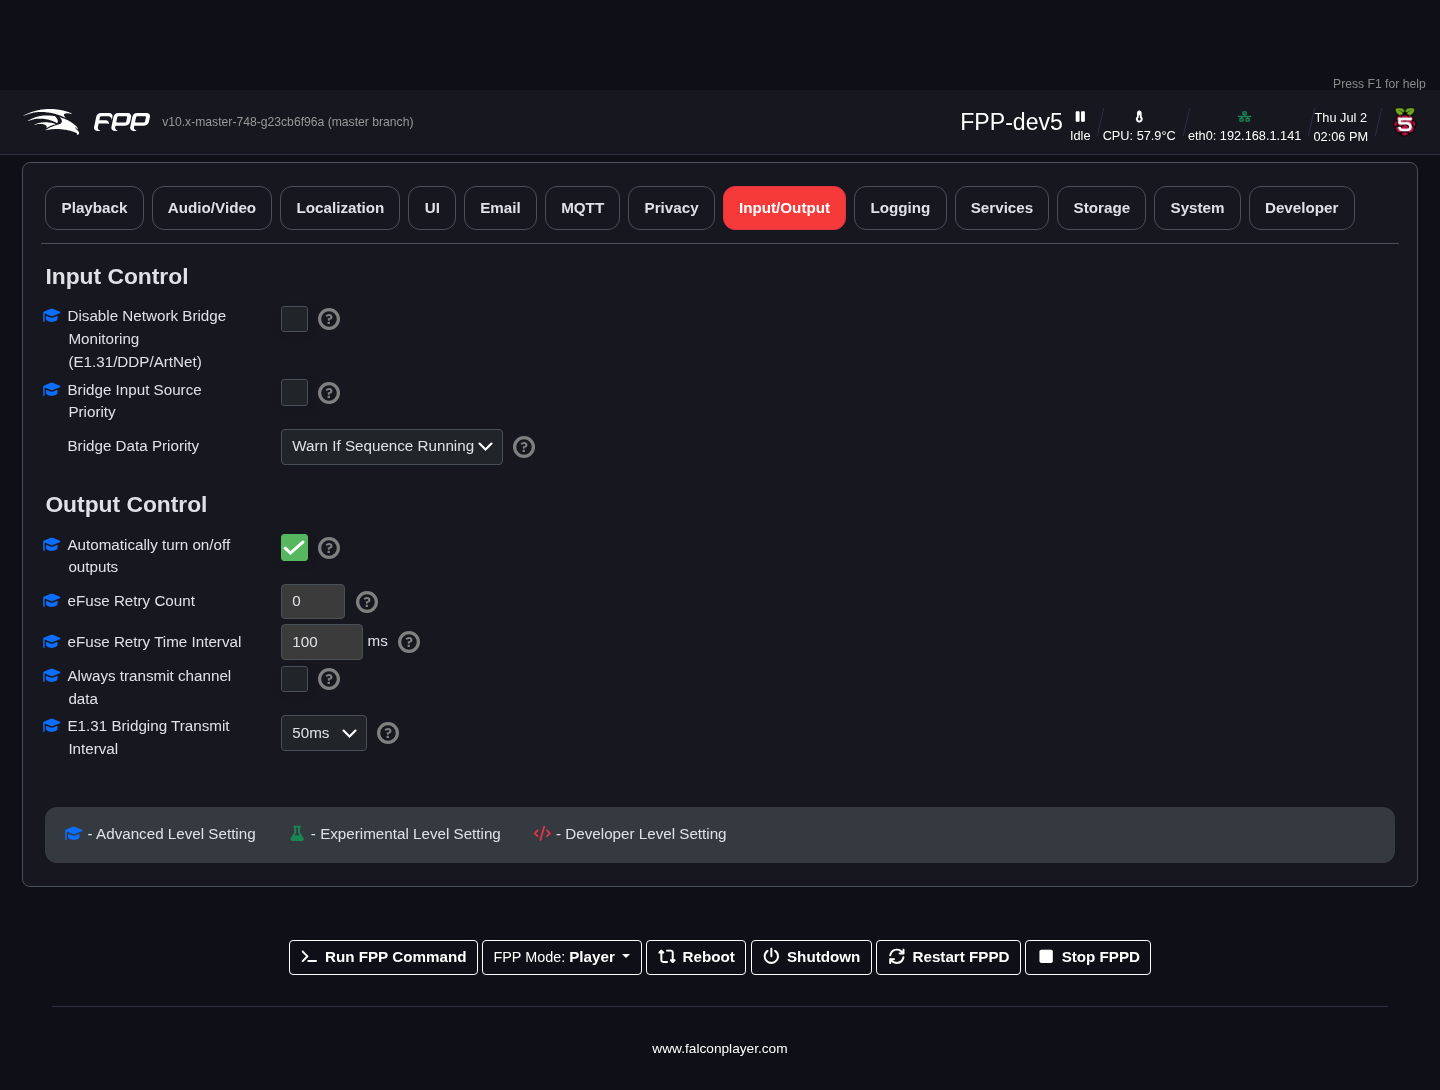
Input Control:
- Disable Network Bridge Monitoring – disable bridge monitoring (useful when developing your own bridge listener). (Advanced.)
- Bridge Data Priority – how FPP treats incoming bridge data versus local
playback:
- Warn if Sequence is running – warn but keep playing the local sequence.
- Prioritize Bridge – incoming bridge data overrides local sequences.
- Prioritize Sequence – local sequences override bridge data; bridge data is used only when nothing is playing (usually what you want during show season, so bridging does not interrupt the show).
Output Control (Advanced):
- Automatically turn on/off outputs – for controllers that can cut output power when idle.
- Efuse Retry count / interval – automatically reset tripped eFuses (good for intermittent trips, especially at startup), and the wait between retries.
- Always transmit channel data – force output whenever FPP is running (FPP normally transmits only when a sequence plays or an overlay model is enabled). Use only for older controllers that go into test mode without data.
- E1.31 Bridging Transmit Interval – timing interval in bridge mode (default 50 ms, recommended; some devices only support 50 ms).
- Disable Colorlight outputs on link down – by default FPP disables ColorLight outputs when the link is down, below 1 Gbps, or no receiver is detected (a restart re‑enables it). Disabling this keeps the output active but you still get the warnings.
- Colorlight Firmware Version – manually select the ColorLight receiver firmware version if FPP cannot detect it.
Logging
Sets the logging criteria for the device. FPP creates several logs that help with troubleshooting. Normally leave this at Info unless the development team asks otherwise or you are an advanced user.
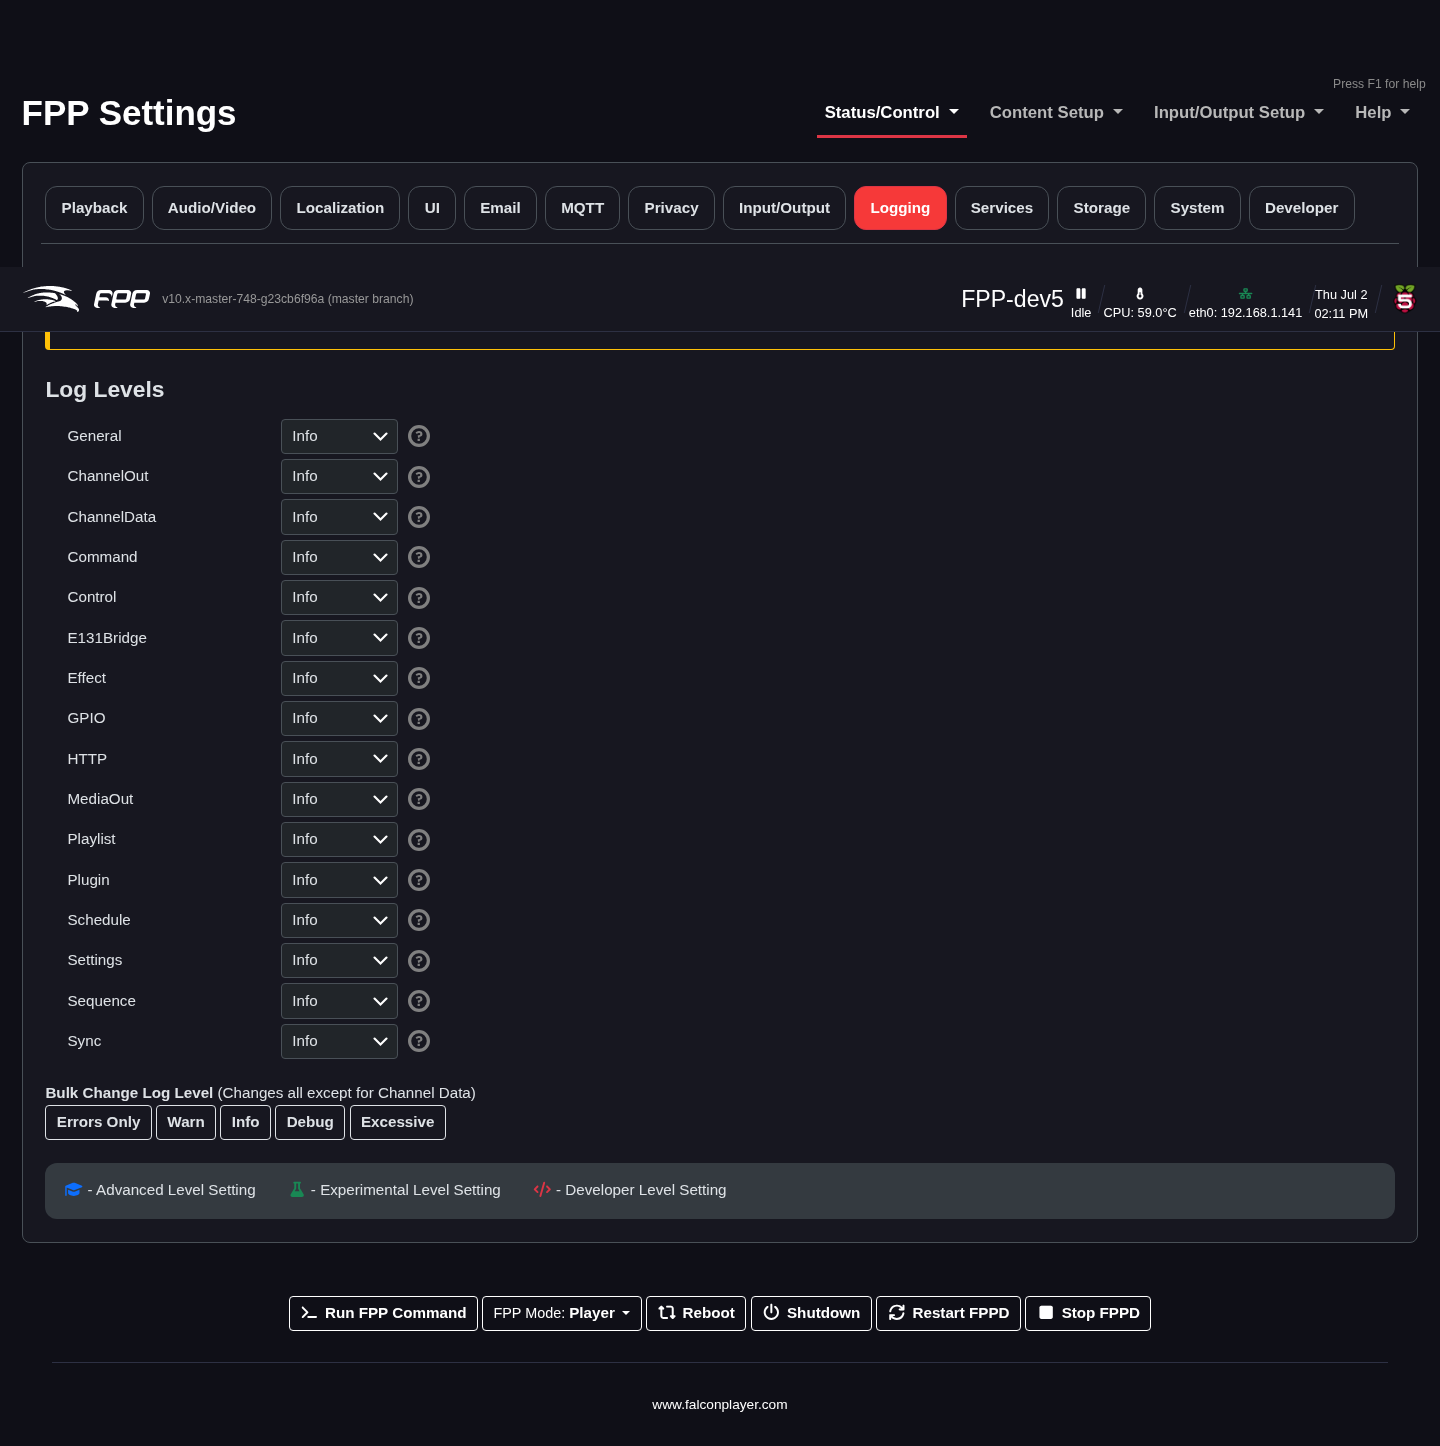
You can set the level per subsystem. The five levels are:
- Errors Only – only items identified as errors.
- Warn – only warnings.
- Info – basic information suitable for most troubleshooting (recommended for production systems).
- Debug – Info plus debug messages; use only when requested.
- Excessive – everything; can create very large log files and impact performance — use only when requested.
Note
Buttons at the bottom let you change all sections at once (except Channel Data).
Services
Configures optional system services; options depend on the SBC.
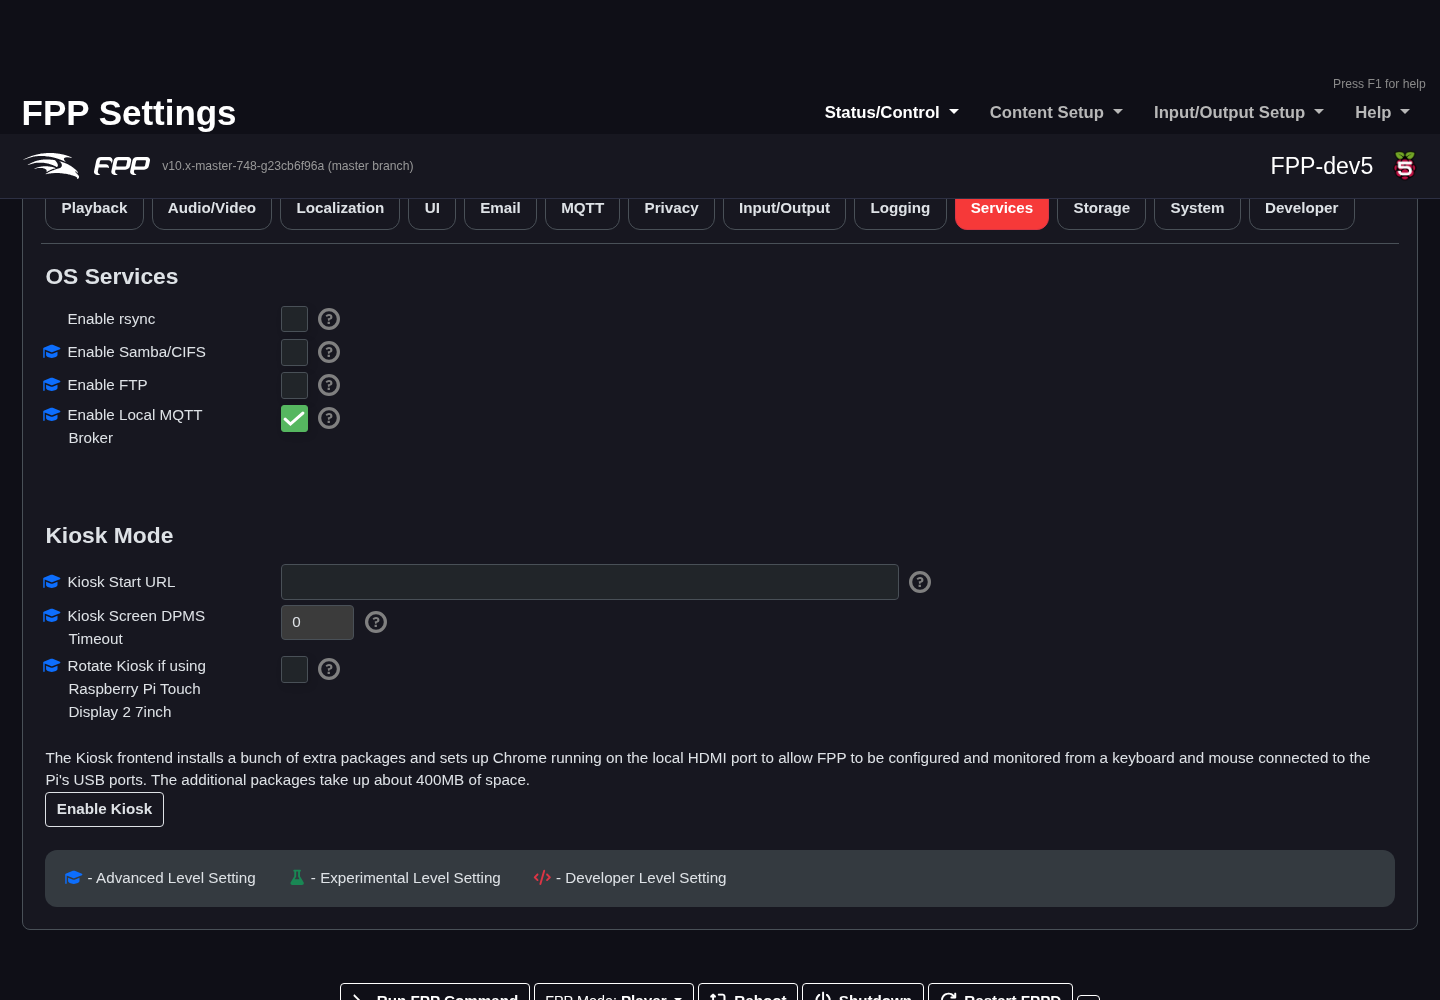
OS Services:
- Enable rsync – allow this device to receive files from other FPP devices (e.g. from the MultiSync page).
- Enable Samba/CIFS – access the media folder over SMB (e.g. Windows File Explorer). (Advanced.)
- Enable FTP – transfer files with an FTP client. (Advanced.)
- Enable Local MQTT Broker – run a local MQTT broker. (Advanced.)
Kiosk Mode (Pi only, Advanced) – for a fully standalone device with a connected touchscreen (an advanced configuration; not all touchscreens are supported):
- Kiosk Start URL – the page shown at startup (default: the Status page).
- Kiosk Screen DPMS Timeout – seconds before the display sleeps.
- Enable Kiosk installs and enables Kiosk mode.
Storage
Configures where sequences and media are stored (Advanced UI Level or higher).
Note
USB thumb drives are not recommended for storage — they have been shown to cause lags and other playback problems, and modern backup methods make them unnecessary.
eMMC Actions (BeagleBone with eMMC, Advanced) – a BeagleBone Black/Green has on‑board eMMC and you can copy the OS to it (not usually recommended):
- Flash to eMMC – copy FPP to the eMMC.
- Flash to eMMC (BTRFS) – copy using BTRFS, which compresses but may slow the device slightly.
Note
If an SD card with an OS is inserted, FPP uses the OS from the SD card.
System
System‑wide settings; the page varies with the SBC and its hardware (there are separate Raspberry Pi and BeagleBone variants).
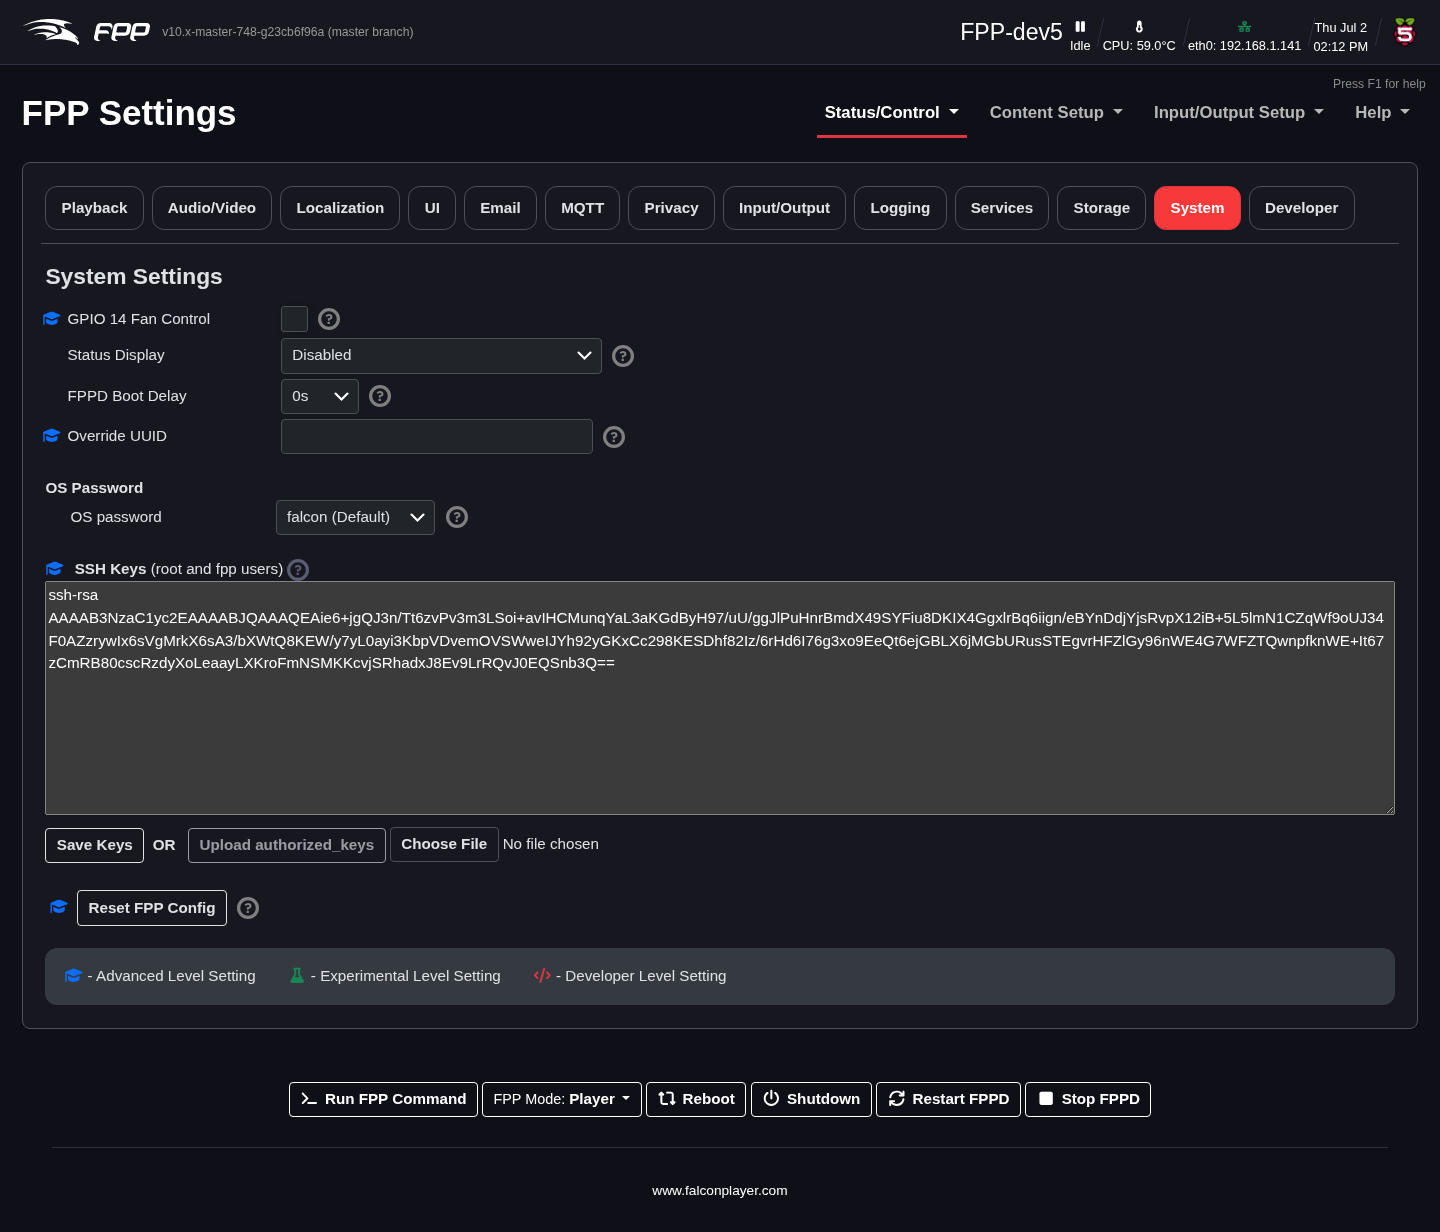
- GPIO 14 Fan Control – PWM fan control on GPIO 14. (Pi only, Advanced.)
- Status Display – configure an OLED screen on the I2C bus (usually auto‑detected at boot); it shows IP addresses, status and the playing sequence. Select your OLED model here.
- FPPD Boot Delay – delay FPP's startup, useful if you power everything on together and want routers/switches to initialise first. The Auto setting waits for a valid time source before booting (falling back to internal time after 10 minutes).
- BeagleBone LEDs – control or disable the five on‑board LEDs (commonly disabled if distracting; defaults recommended). (BeagleBone only.)
- OS Password – the password for SSH and similar access; the default
falconis recommended. - SSH Keys – configure SSH keys to authenticate with a key instead of a password. (Advanced.)
- Reset FPP Config – reset FPP to factory settings, either all options or selected areas — useful if a configuration or an xLights upload has gone wrong.
Warning
Take an FPP Backup before Reset FPP Config (see Backup, Restore and Proxies).
Developer
Only shown at the Developer UI Level; useful for switching FPP versions or developer testing.

- UI Platform Masq – display settings for a different platform than the one detected (for plugin/feature development). Take care, as changes can adversely affect your device.
- Git Branch – choose which FPP version/branch to run, e.g. Master for the latest improvements ahead of release. Note that some upgrades require an OS rebuild to get all benefits (see Final Configuration and Updating).
- Reset Local Changes – revert any manual code changes to the original code.
- Git Status – show the status of your local FPP version.
- FPP Rebuild – recompile all FPP files (useful after an interrupted install or corrupted files).