Network
The Network page (Status/Control → Network) is where you set up networking so your FPP devices and controllers can all communicate as needed. Networking works similarly whether wired or wireless, and the two work together. The page has three tabs: Interface Settings, Global Network Settings (host and DNS), and Tethering.
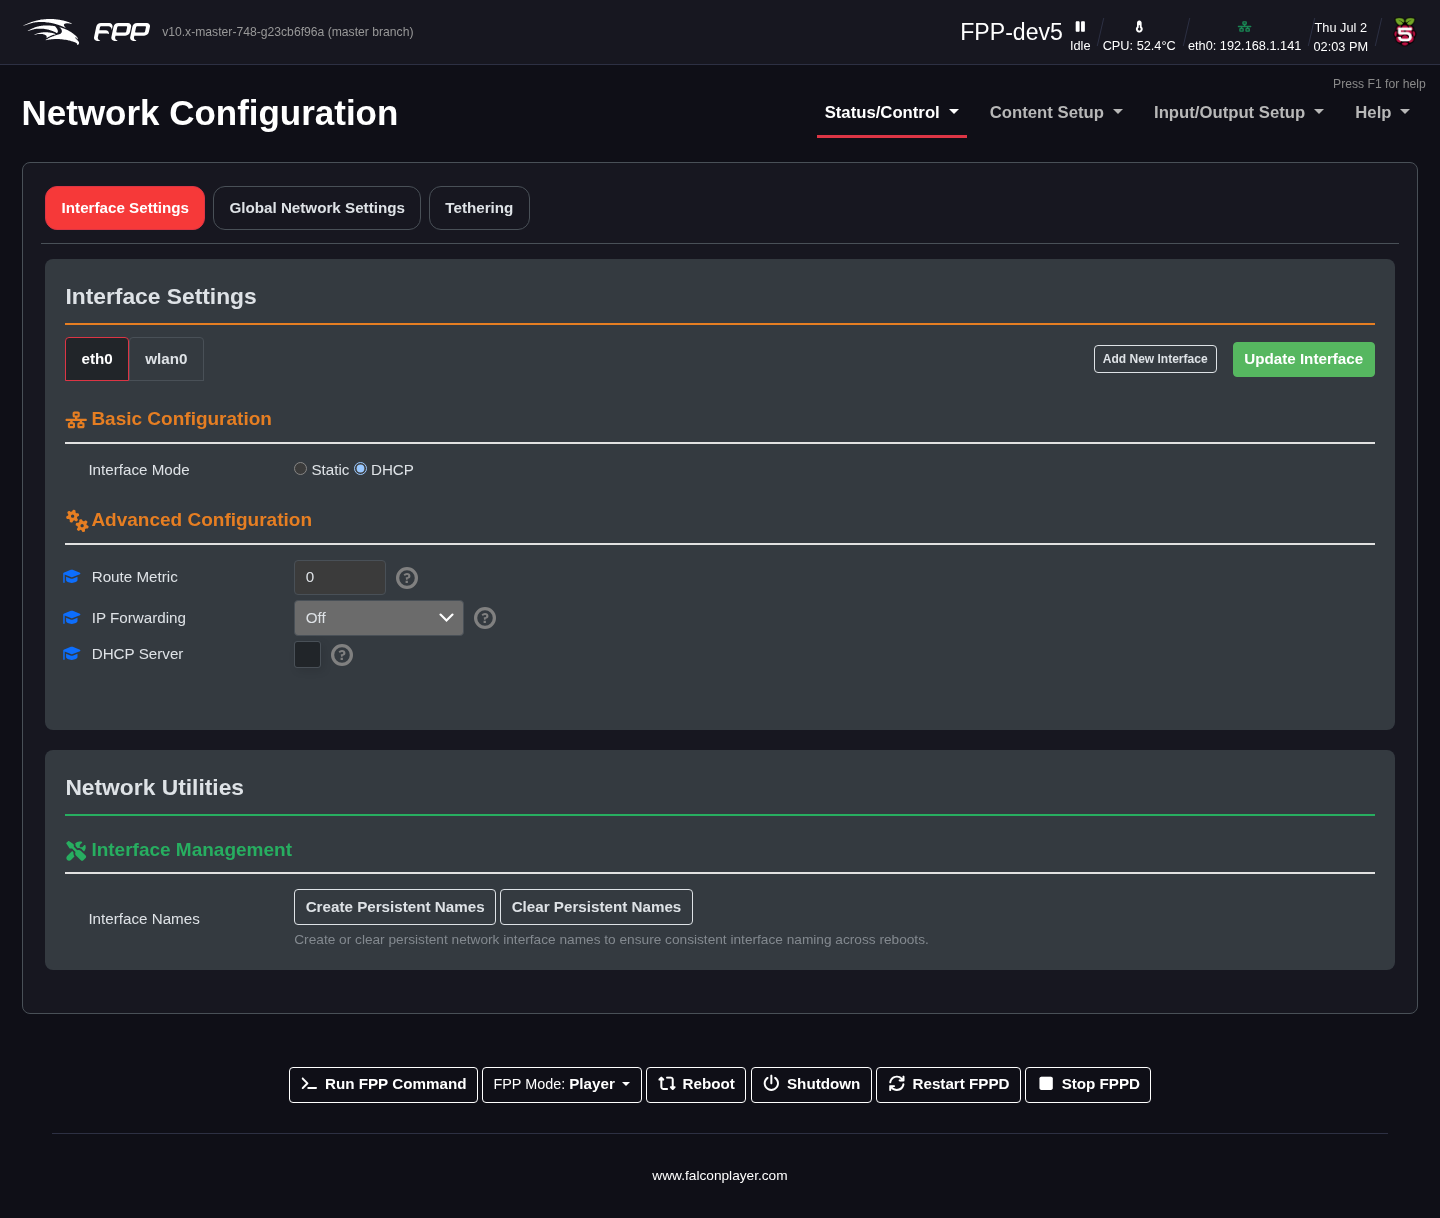
Because there are so many ways to configure a network, these settings cause many people difficulty. The basic setup earlier in this manual will get you running, though it may not be the best long‑term arrangement; the sections below should give you a better understanding for your situation. For deeper background on IP addressing, see Advanced Options → Networking Considerations.
Interface Settings
Depending on the device, FPP may have up to two built‑in network interfaces (more if you add adapters, though that is uncommon): eth0 for wired Ethernet and wlan0 for wireless. If you have both, configure each separately.
- Wi‑Fi Regulatory Domain – enter your country. Some jurisdictions have regulations, and Wi‑Fi will not work correctly unless this is set right.
- Interface Name – lists all interfaces (
eth0,eth1, … wired;wlan0,wlan1, … wireless). Select one to edit its settings. - Interface Mode:
- Static – you assign the IP address. You must ensure each address is unique and does not clash with one your router has already handed out via DHCP. Many routers assign DHCP addresses from the low end of the range (not always), and some let you limit the DHCP range to avoid conflicts.
- DHCP – your router assigns and manages the address and gateway. This is the easiest method, but your router may not retain the address if the device is disconnected for a long time (you can usually still reach FPP by host name), and the interface must be on a network with a DHCP server.
Note: If you use both interfaces they should be on different subnets, and only one interface should have a gateway — normally the one connected to your home network.
- IP address – unique to this device/interface, in the same subnet as the network it talks to (usually the first three number groups). The Ping button checks whether an address is already in use.
- Netmask – defines the network size; most consumer networks use
255.255.255.0. - Gateway – configure only on the interface connected to your home/show router, set to that router's IP. With two interfaces, only one has a gateway.
For wlan0 there are additional settings:
- WPA SSID – your wireless network name (tick Hidden for a hidden SSID).
- WPA Pre‑Shared Key – the password; use the eye icon to reveal it and check it is correct.
- Backup WPA SSID / PSK – an alternate network FPP tries if it cannot reach the primary. (Advanced UI Level or higher.)
- Route Metric – leave at default for most setups. If more than one interface has a gateway (unusual), give your primary interface a lower number. (Advanced.)
- IP Forwarding – enable when FPP connects to Wi‑Fi and also feeds a
controller/switch over Ethernet and you are not using a Proxy Host (not needed
with a cape/hat or in standalone mode):
- Off – no forwarding.
- Forwarding – forwarding within the local network only; forwarded devices may not have internet access.
- Masquerading/NAT – forwarding with NAT, giving forwarded devices internet access without complex static routing. Configure this on the interface connected to your home network.
Note: This replaces the old "Enable Routing between network interfaces" option on the former Interface Routing tab. (Advanced.)
- DHCP Server – let FPP hand out addresses to connected devices — useful on a Separate Show Network with no router. Only one device on a network should issue DHCP, and it must have a static IP.
Caution: If you connect this interface to your home network with the DHCP server enabled, devices may get incorrect addresses. Assigned devices appear under Static Leases, where you can create a reservation. (Advanced.)
- DHCP Pool Offset / Size – the starting address and number of addresses the DHCP server may assign. (Advanced, with DHCP enabled.)
- Update Interface – saves the settings for the current interface. Click it before moving to another interface, and again when finished; then reboot.
- Add New Interface – configure an
eth0orwlan0interface even when the physical hardware is not yet present (e.g. configuring wlan0 for a BeagleBone before its Wi‑Fi adapter/cape is attached). (Advanced.) - Create Persistent Name – when using more than one Ethernet interface
(common with a ColorLight board) and you need the adapters to keep their order,
create persistent names. Best practice:
- Power down the device.
- Ensure only the primary Ethernet interface is installed.
- Power up the device.
- Plug in the USB Ethernet adapter.
- Configure
eth0andeth1. - Click Update Interface, then Create Persistent Name.
This saves the configurations so they load in the correct order.
Global Network Settings (Host & DNS)
This tab assigns the device's host name and DNS settings.
- Host Name – the "human" name used to reach the device (like typing a domain
instead of an IP). If DNS or another part of your network is misconfigured the
host name may not resolve, but you can still reach FPP by IP address. Choose
something meaningful and unique among your devices — e.g.
FPPMaster,FrontLawn,HouseOutline. Names may contain only letters, numbers and hyphens (-), may not begin or end with a hyphen, and cannot contain spaces. After changing it you can no longer usehttp://fpp.local/; use the new name (e.g.http://YardProps.local/) or the IP address. Save after entering it.
Keeping the default
FPPis possible if you will never add another instance, but renaming is strongly recommended — shows tend to grow, and duplicate names cause confusion.
- Host Description – additional, free‑form text (no host‑name restrictions) shown on the MultiSync page and the xLights FPP Connect screen.
- DNS servers – with any static interface, set DNS to Manual and enter
servers; typically your router's IP for one and an internet server such as
8.8.8.8for the other.
Tethering
FPP supports two kinds of tethering: Wi‑Fi Tethering, where FPP acts as its own access point, and USB Tethering, where FPP connects directly to a computer by USB cable.
Wi‑Fi Tethering
Wi‑Fi Tethering lets you reach FPP when nothing is connected to the Ethernet or
Wi‑Fi interfaces — especially useful on a Raspberry Pi whose on‑board Wi‑Fi
supports AP mode (not all adapters do). Bring your computer near the device,
connect to the FPP wireless network (password Christmas), and browse to
192.168.8.1.
Note
If the device has an OLED screen it will display a QR code you can scan to reach it.
There are three Wi‑Fi tethering modes:
- If no connection (default) – FPP starts the FPP access point at boot only if it detects no network on any interface. (A device connected to an Ethernet port usually counts as a connection, so AP mode will not start.)
- Enabled – FPP always starts the access point at boot.
- Off – the access point is never started.
USB Tethering
USB Tethering connects FPP directly to your computer with a USB cable, as described in Installing the FPP Software → USB Tethering Installation. It is often the easiest way to reach a device for setup, on the hardware that supports it.